How are you all doing? I’ve been self-isolating for a few weeks and if you’re anything like me, I’m sure some of you are starting to lose your sanity. One reassuring thing about all the uncertainty and fear is that we’re all going through this together. I’ve been spending a lot of time cleaning the house and getting things organized while my client projects slow down (this is not the time to have subcontractors and vendors in your homes). There are some things still up in the air for the upcoming Spring One Room Challenge, but for the most part, I’m plugging along with working from home. I’m grateful I have that option, and grateful that (so far) my immediate family members who work in healthcare have been safe. I’ve been struggling with how to bring things to you all that can be helpful even when we’re not in the most uplifting or optimistic of times. But I do have some projects that I’ve been able to tackle at home, and if you’re up for some DIY I think you could handle this first project.
Here’s how it all began, back in 2017. When we bought our house, the Crhacienda, the previous owner had made some questionable choices when it came to the finishes in the house. None of them were that offensive on their own, but they made for an all together barfy situation. No joke, this is what it looked like during our home inspection, complete with uninspiring staging. Don’t worry, we’ve made so much progress since this photo and you can see the full dining room makeover here.
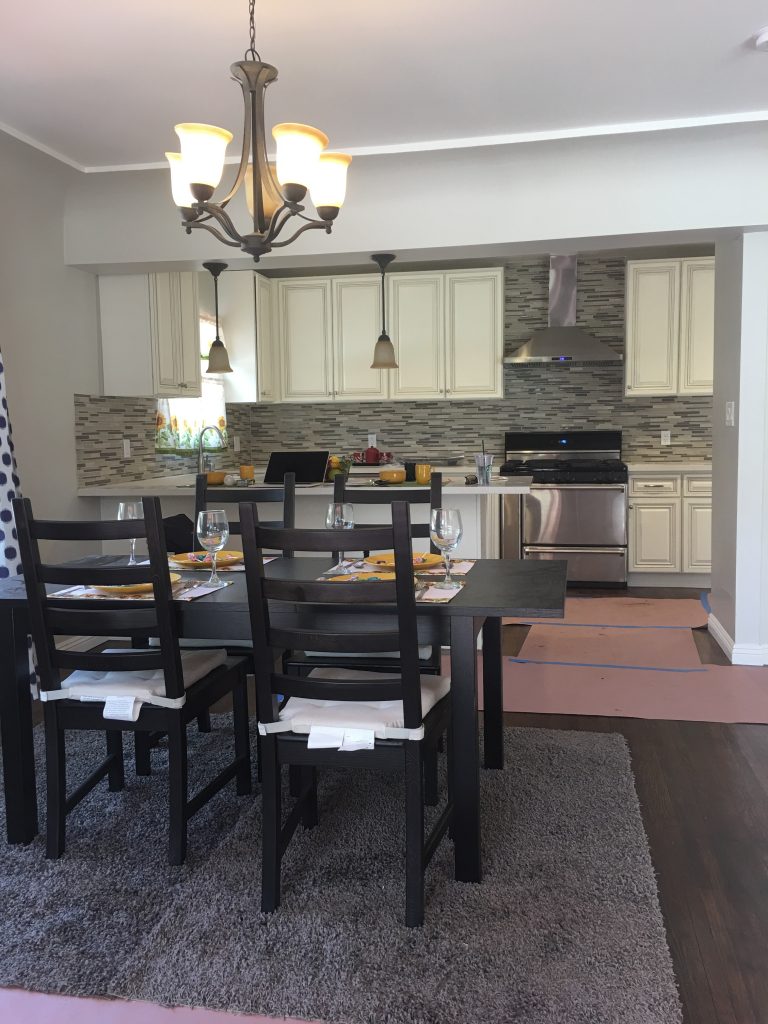
That cabinet over the peninsula really bugged me. It was blocking the light from the window over the sink, and it was annoyingly in-your-face when we had guests over and they wanted to hang around the kitchen to catch up. This wasn’t exactly on the top of my list, but while we were updating the dining room we thought it was a good time to tackle this awkward corner too. I mean…if you’re already going to be patching and painting, why not?
THE PLAN
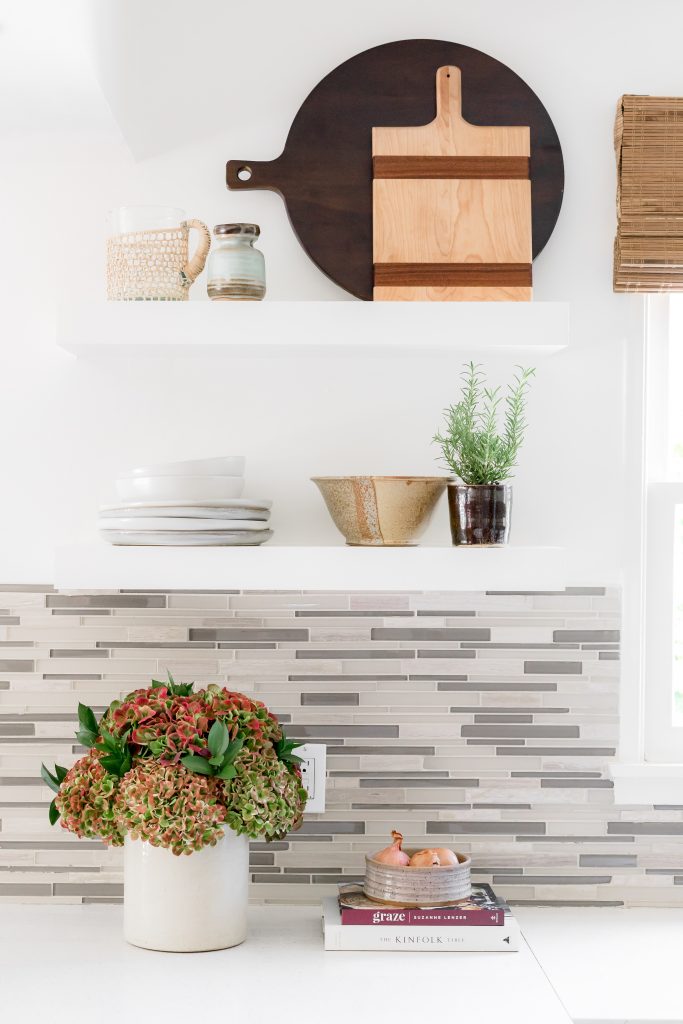
I wanted two floating shelves for this area because it didn’t need to be as functional as it needed to be pretty. Some of you are screaming at the screen right now, “what about storage!?” and I hear that. But I knew we could live without the extra storage from that single upper cabinet. We have other cabinets that are completely empty in our kitchen and a pantry with plenty of space. I know, very luxurious. I just wanted this spot to be aesthetically pleasing since it’s very visible from the living room and dining room as soon as you come into the house.
CabinetParts.com
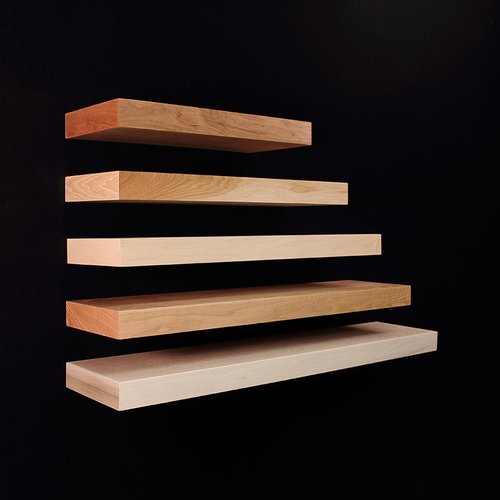
I bought these 30″ paint grade shelves from Cabinet Parts. They have them in all different sizes and finishes, but I wanted to paint mine to match the wall color to help bring some calm to that spot.They shipped them to me along with the installation hardware and installing the shelves was an easy DIY. If you’ve used anchors and hung things in your house before I know you can do this. I just followed their instructions to hit studs or use the appropriate anchors if I didn’t hit a stud.
WHAT YOU’LL NEED
Hammer, Drill, Screwdriver, Level, Joint Compound, Tape Knife, Sanding Sponge, Primer, Paint. And paint supplies like brushes, rollers, trays, blue tape, drop cloths, etc.

DEMO & PREP
It was so satisfying to remove the upper cabinet and patch the walls up. The cabinet did some minor damage to the wall when I took it down, much more than regular spackle could handle. So joint compound is really your friend for this job. I applied multiple thin layers of joint compound until there was enough to fill the imperfections and damage on the wall. When it was all dry I used a sanding sponge to smooth it all out. Then it was time to install the shelves. Unfortunately, I didn’t take any photos during the installation, but I honestly just followed the exact instructions included with the shelves. Really.

PRIME & PAINT
Yes, that’s a trash bag around the pendant light. Look, I’m not pretending to be a professional painter with all the right supplies. I used a combination of a roller and a brush to prime the walls, and I brushed the shelves. If you have been following along with the #crhacienda then you know my go-to white paint for the house is Whisper from Dunn Edwards. I like it because it’s a dependable clean white with just a hint of warmth. Since this wall is open to the dining room I continued the eggshell finish on the walls but switched out the shelves to a semi-gloss. If you want that super smooth finish then lightly sand your shelves between coats of paint.

WAIT. SERIOUSLY.
And now for a warning you may not have heard before: paint needs time to cure. Really. For surfaces like shelves and cabinets most paints need several weeks so be sure to read about your paints or ask the sales representative how long your paint needs to cure. I didn’t put anything on my shelves for 3 weeks and it was so hard to resist styling them and making them beautiful for that long. I’m offering this to you as a cautionary tale. When your vase or cook book gets stuck to the paint and pulls it off your new shelves don’t come crying to me.
STYLE AND ENJOY

I finished this project during a weekend and that was really taking my time. If you’re no stranger to DIY home improvement projects (like me) you probably have most or all of the supplies to finish this floating shelf makeover. It’s a perfect sheltering-in-place project since you can get the shelves delivered to your doorstep. I’d love to hear from you in the comments. Are you planning some small projects around the house too?