Remember last week when I said it’s going to get worse before it gets better? Well, that’s officially the theme of Week 4 of our One Room Challenge master bedroom makeover. This week’s post is focused on the master closet. If you read Week 3‘s post, then you know this is going to be the most awesome little room in the entire Crhacienda. I decided it would be easier to show you a few phases of the progress all in one satisfying post. Keep reading for more about this small-but-mighty space!

If you clicked through from the ORC site, howdy! I’m Shaun Crha (sir-ha), an interior designer in Long Beach, CA. You can see my previous One Room Challenge renovation here. My husband, Sean, and I are currently renovating our 1930 Spanish bungalow – the Crhacienda. Get it? Because my last name is Crha! 🙄🤣 We’ve already finished the following spaces: our dining room, laundry room, front garden, and a completely new guest house (the Casita). Thank you for joining us as we tackle our master bedroom makeover! If you’re trying to catch up on everything be sure to visit my Week 1 post (before pictures, inspiration, and moodboard), Week 2 (design plan, progress, design concept), Week 3 (the master closet plans, trim paint progress, the great dresser debate).
MASTER CLOSET PROGRESS
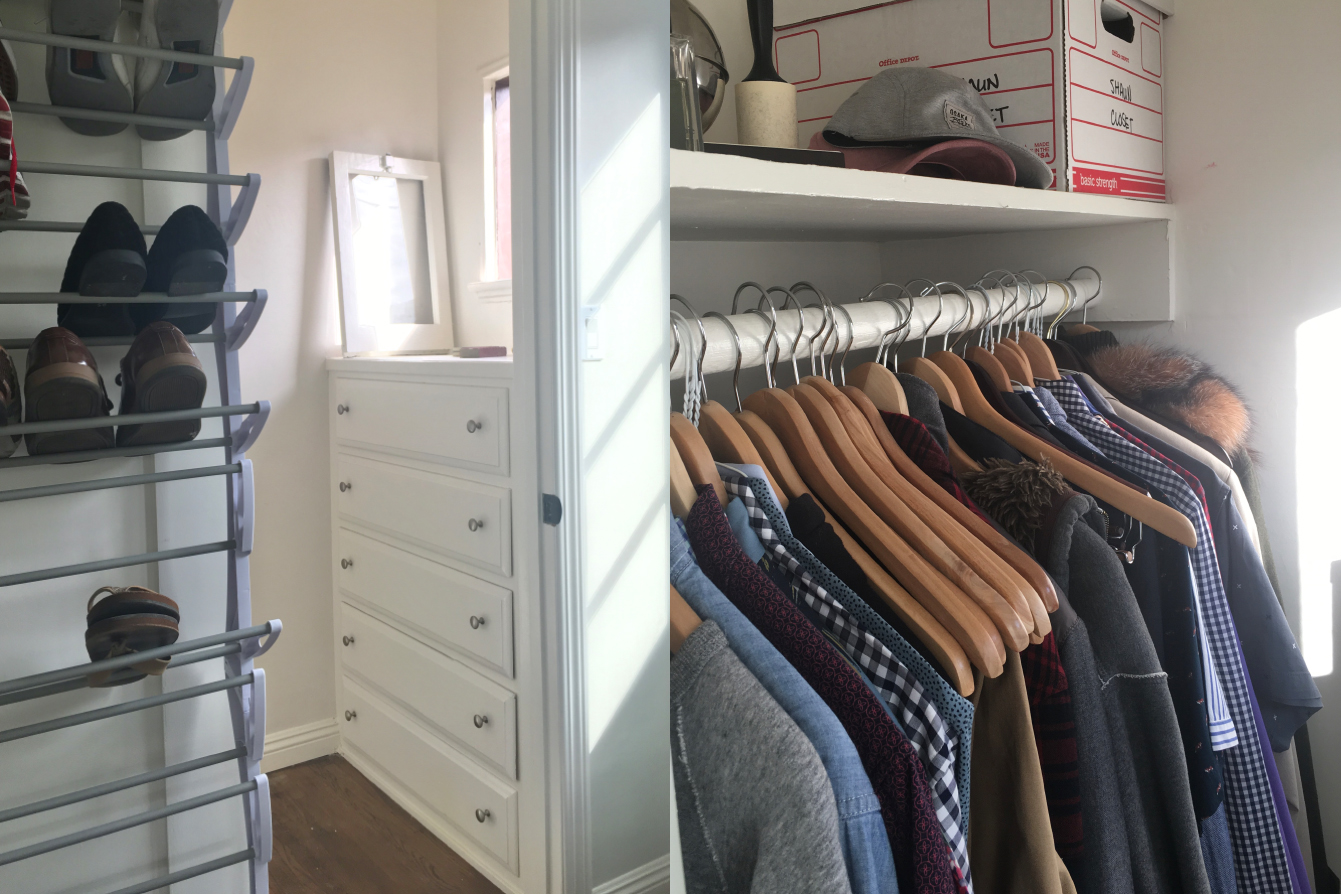
Here’s just a quick reminder of things looked before we got started on the closet. The first thing to go was the old shelf and the single closet rod since we’ve got a new double rod closet organizer coming to help double the hanging capacity of this small-but-mighty closet. Now, in my defense, I thought this wasn’t going to be so hard. But I soon learned a big lesson that you’ll understand better when you look at the pictures below.


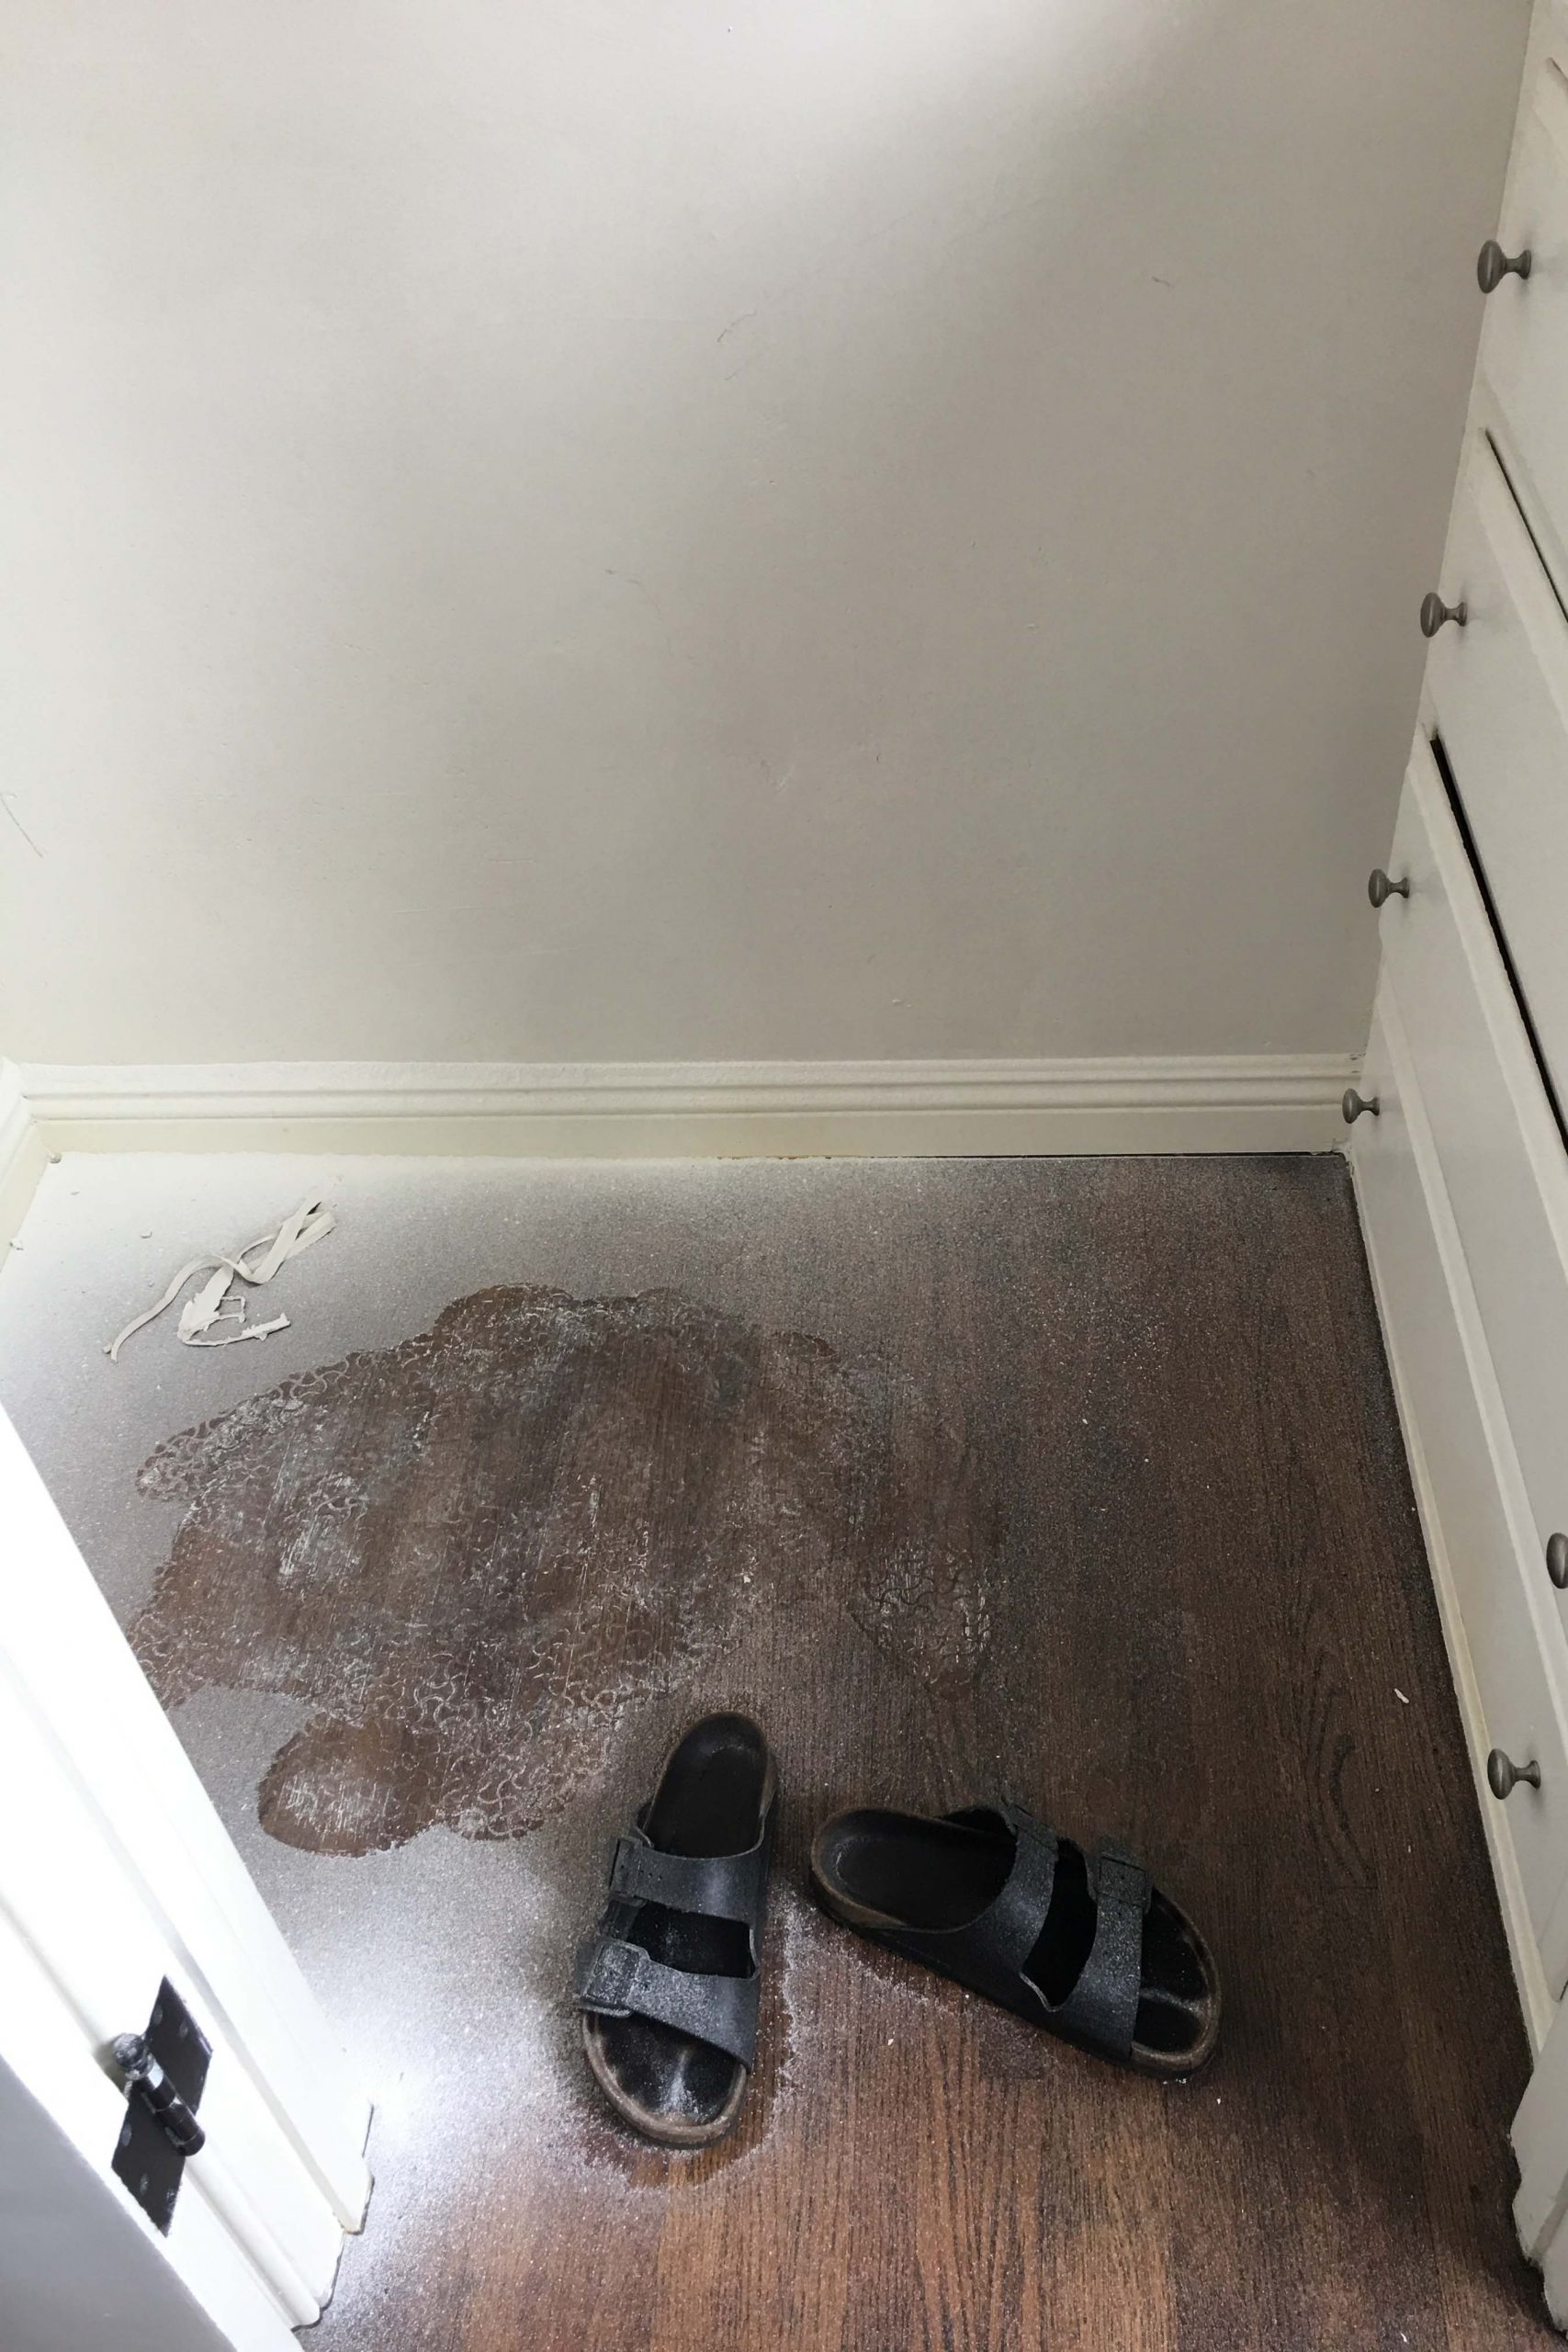
When they built our house in 1930 they installed the closet rod and shelf before they finished the final coat of the plaster. That yellow gritty stuff is the scratch coat under the finish coat of plaster. I imagined that I would demo the closet organizers and do some small patch or repair work, but that’s not what the Renovation Gods had in store for me. I had to whip out my drywall compound, mix it up like pancake batter, and start applying it in thin even layers until I had a nice finish coat built up. It all sounds faster and easier than it was in real life.
THE DEVASTATION

Then came sanding and the inevitable drywall dust that is the scourge of every construction site. Since I’m a seasoned renovation professional, I naturally wore my Birkenstocks for this task and I don’t regret it. Once I got a smooth texture on the walls I primed the entire closet and applied two coats of a velvet finish paint. I used the extra white paint I had on hand from my garage and let the paint fully cure. Always do this before installing wallpaper so if you need to remove the paper in the future it will only take off some paint with it (and not the drywall or plaster underneath). Trust me, it’s so much easier to deal with some torn off paint than it is drywall and plaster.
A LITTLE PREVIEW
This is the first time I’m putting wallpaper in the house, so you know I was excited to finally get it installed. From the moment I found the wallpaper I knew it was the right blend of neutral and masculine with a relaxed geometric quality. I wanted it to contrast against the darker green bedroom and feel bright since we have the small transom window in there to brighten things up.
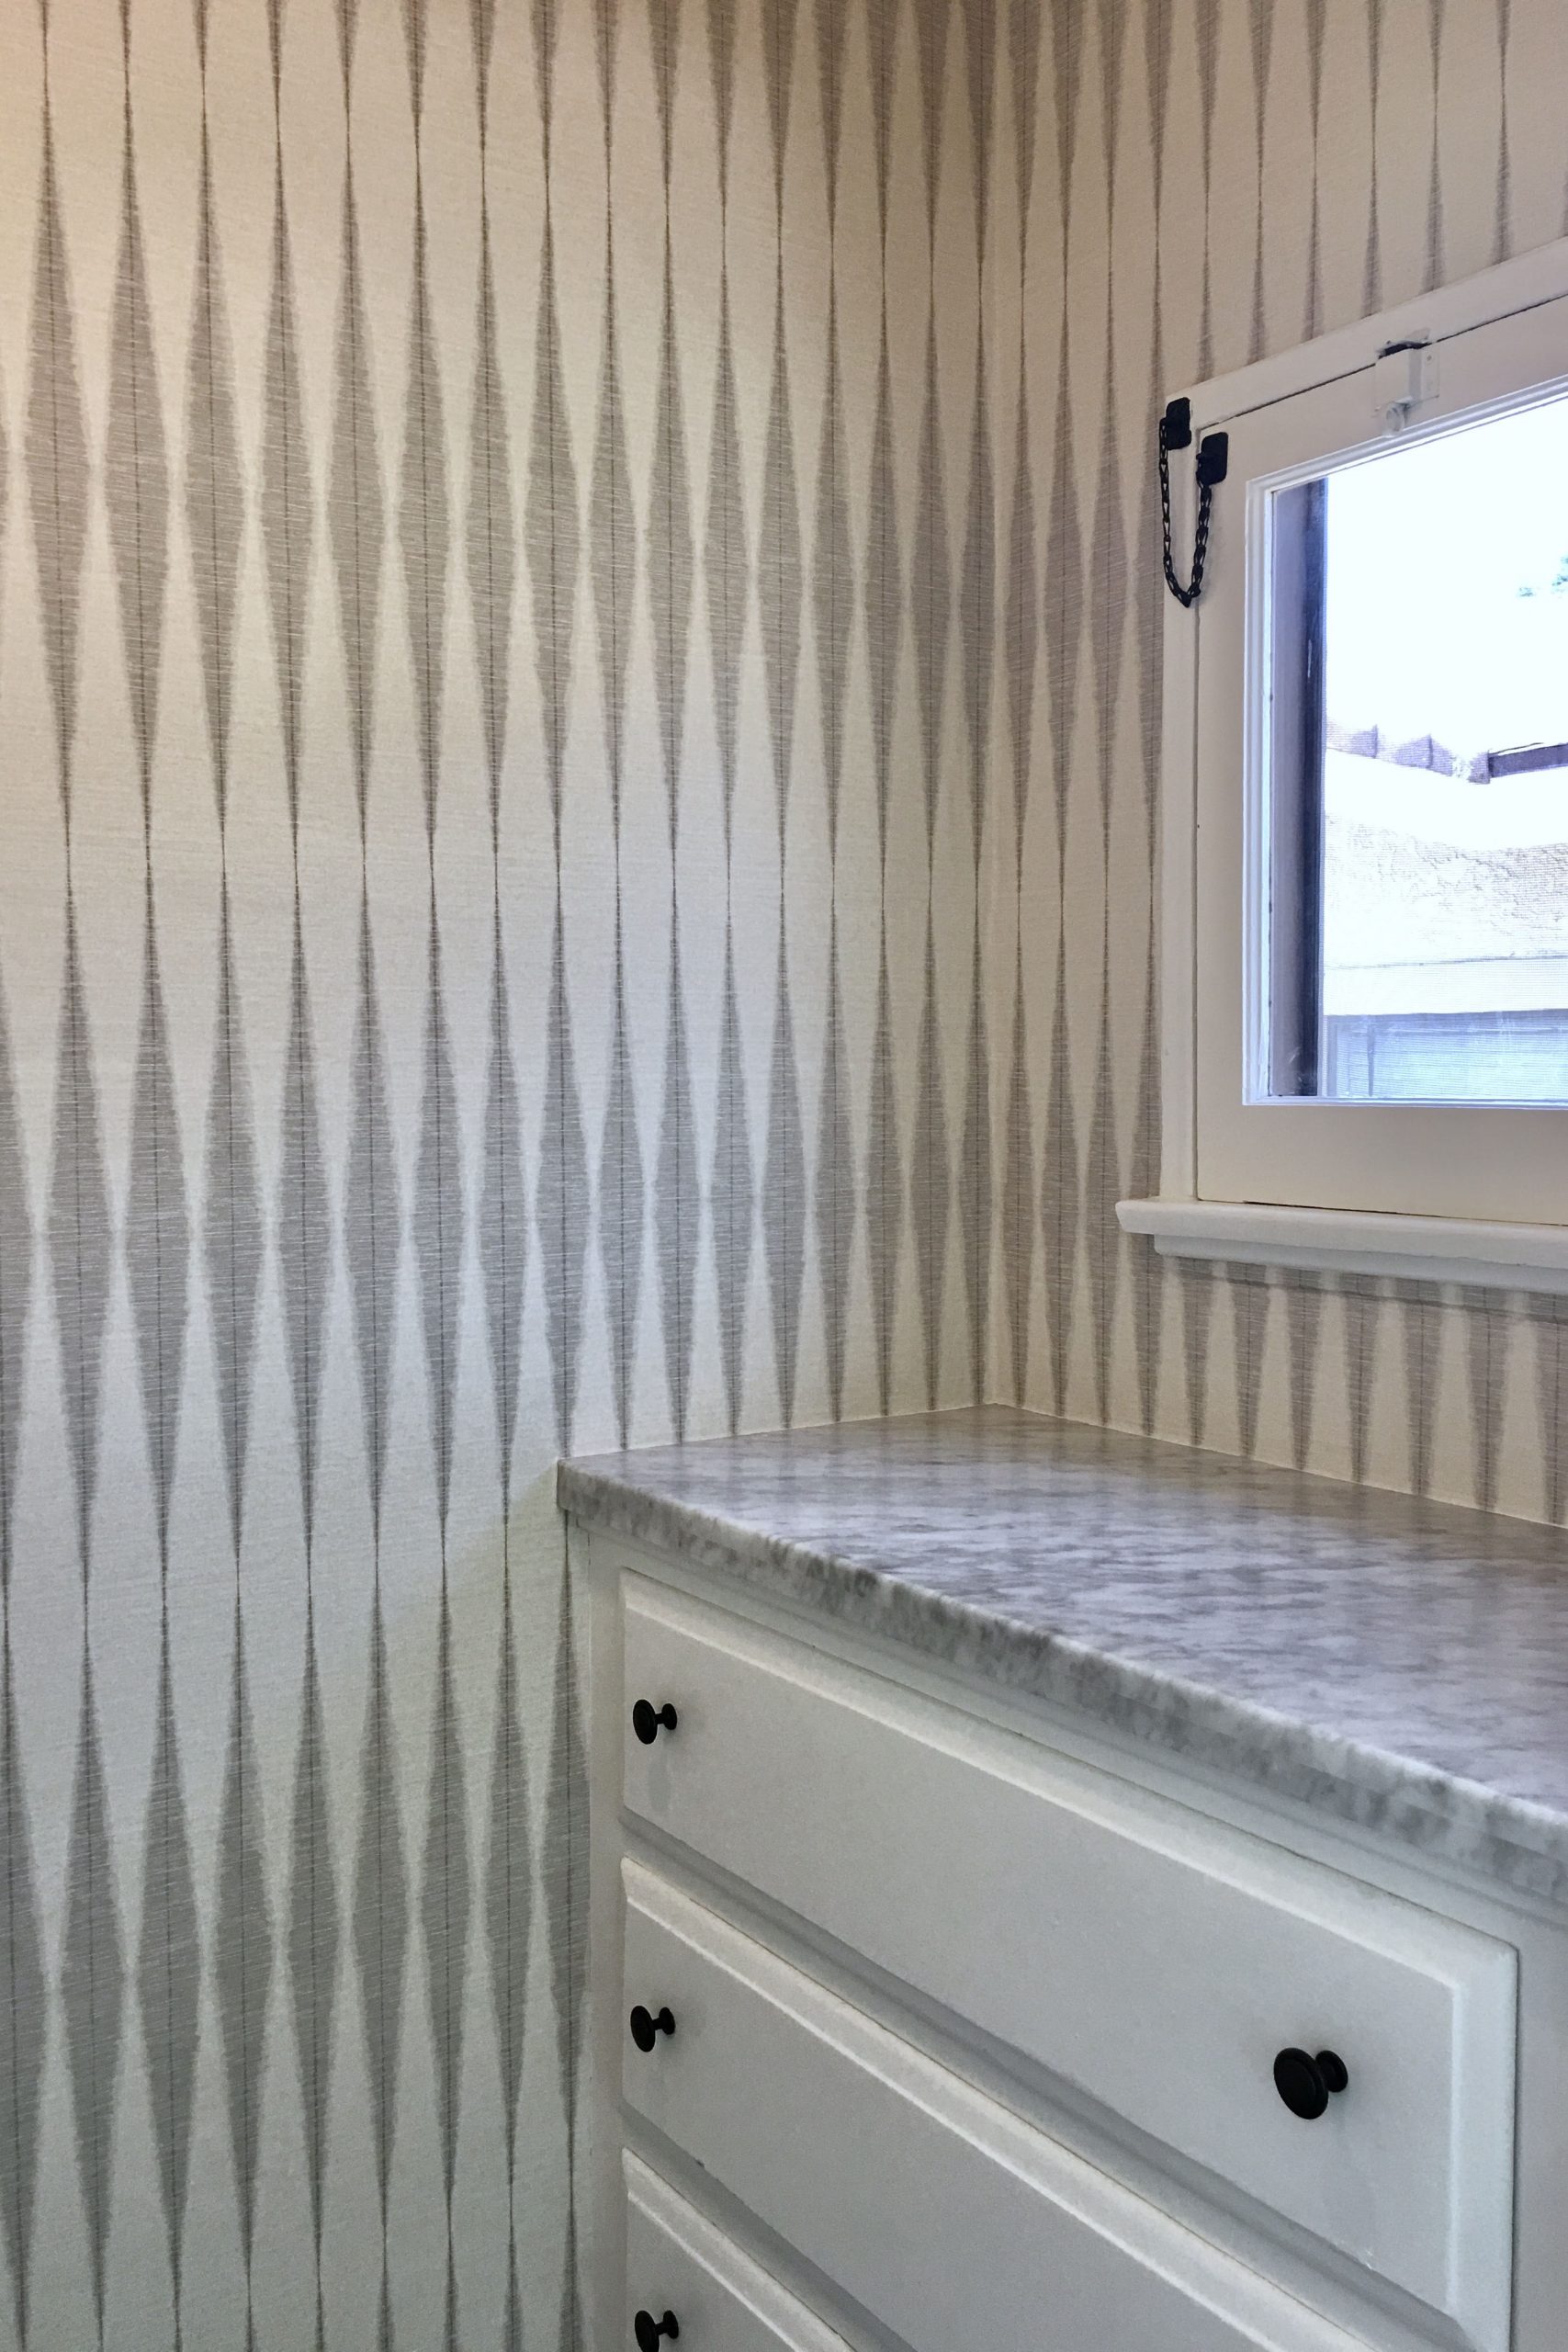
I also got to work with Granite Tops again, who you’ll remember came through with a fabulous soapstone remnant for my Laundry Room One Room Challenge. This time I asked them to help find a marble remnant to install on top of the built-in dresser to make it feel more intentional and elevated. Remnants are great because the cost of the material has already been offset by the first person who purchased the slab. Most fabricators or stone yards are happy to sell remnants at affordable prices. I like using them for clients too when they need something small like a single vanity countertop.
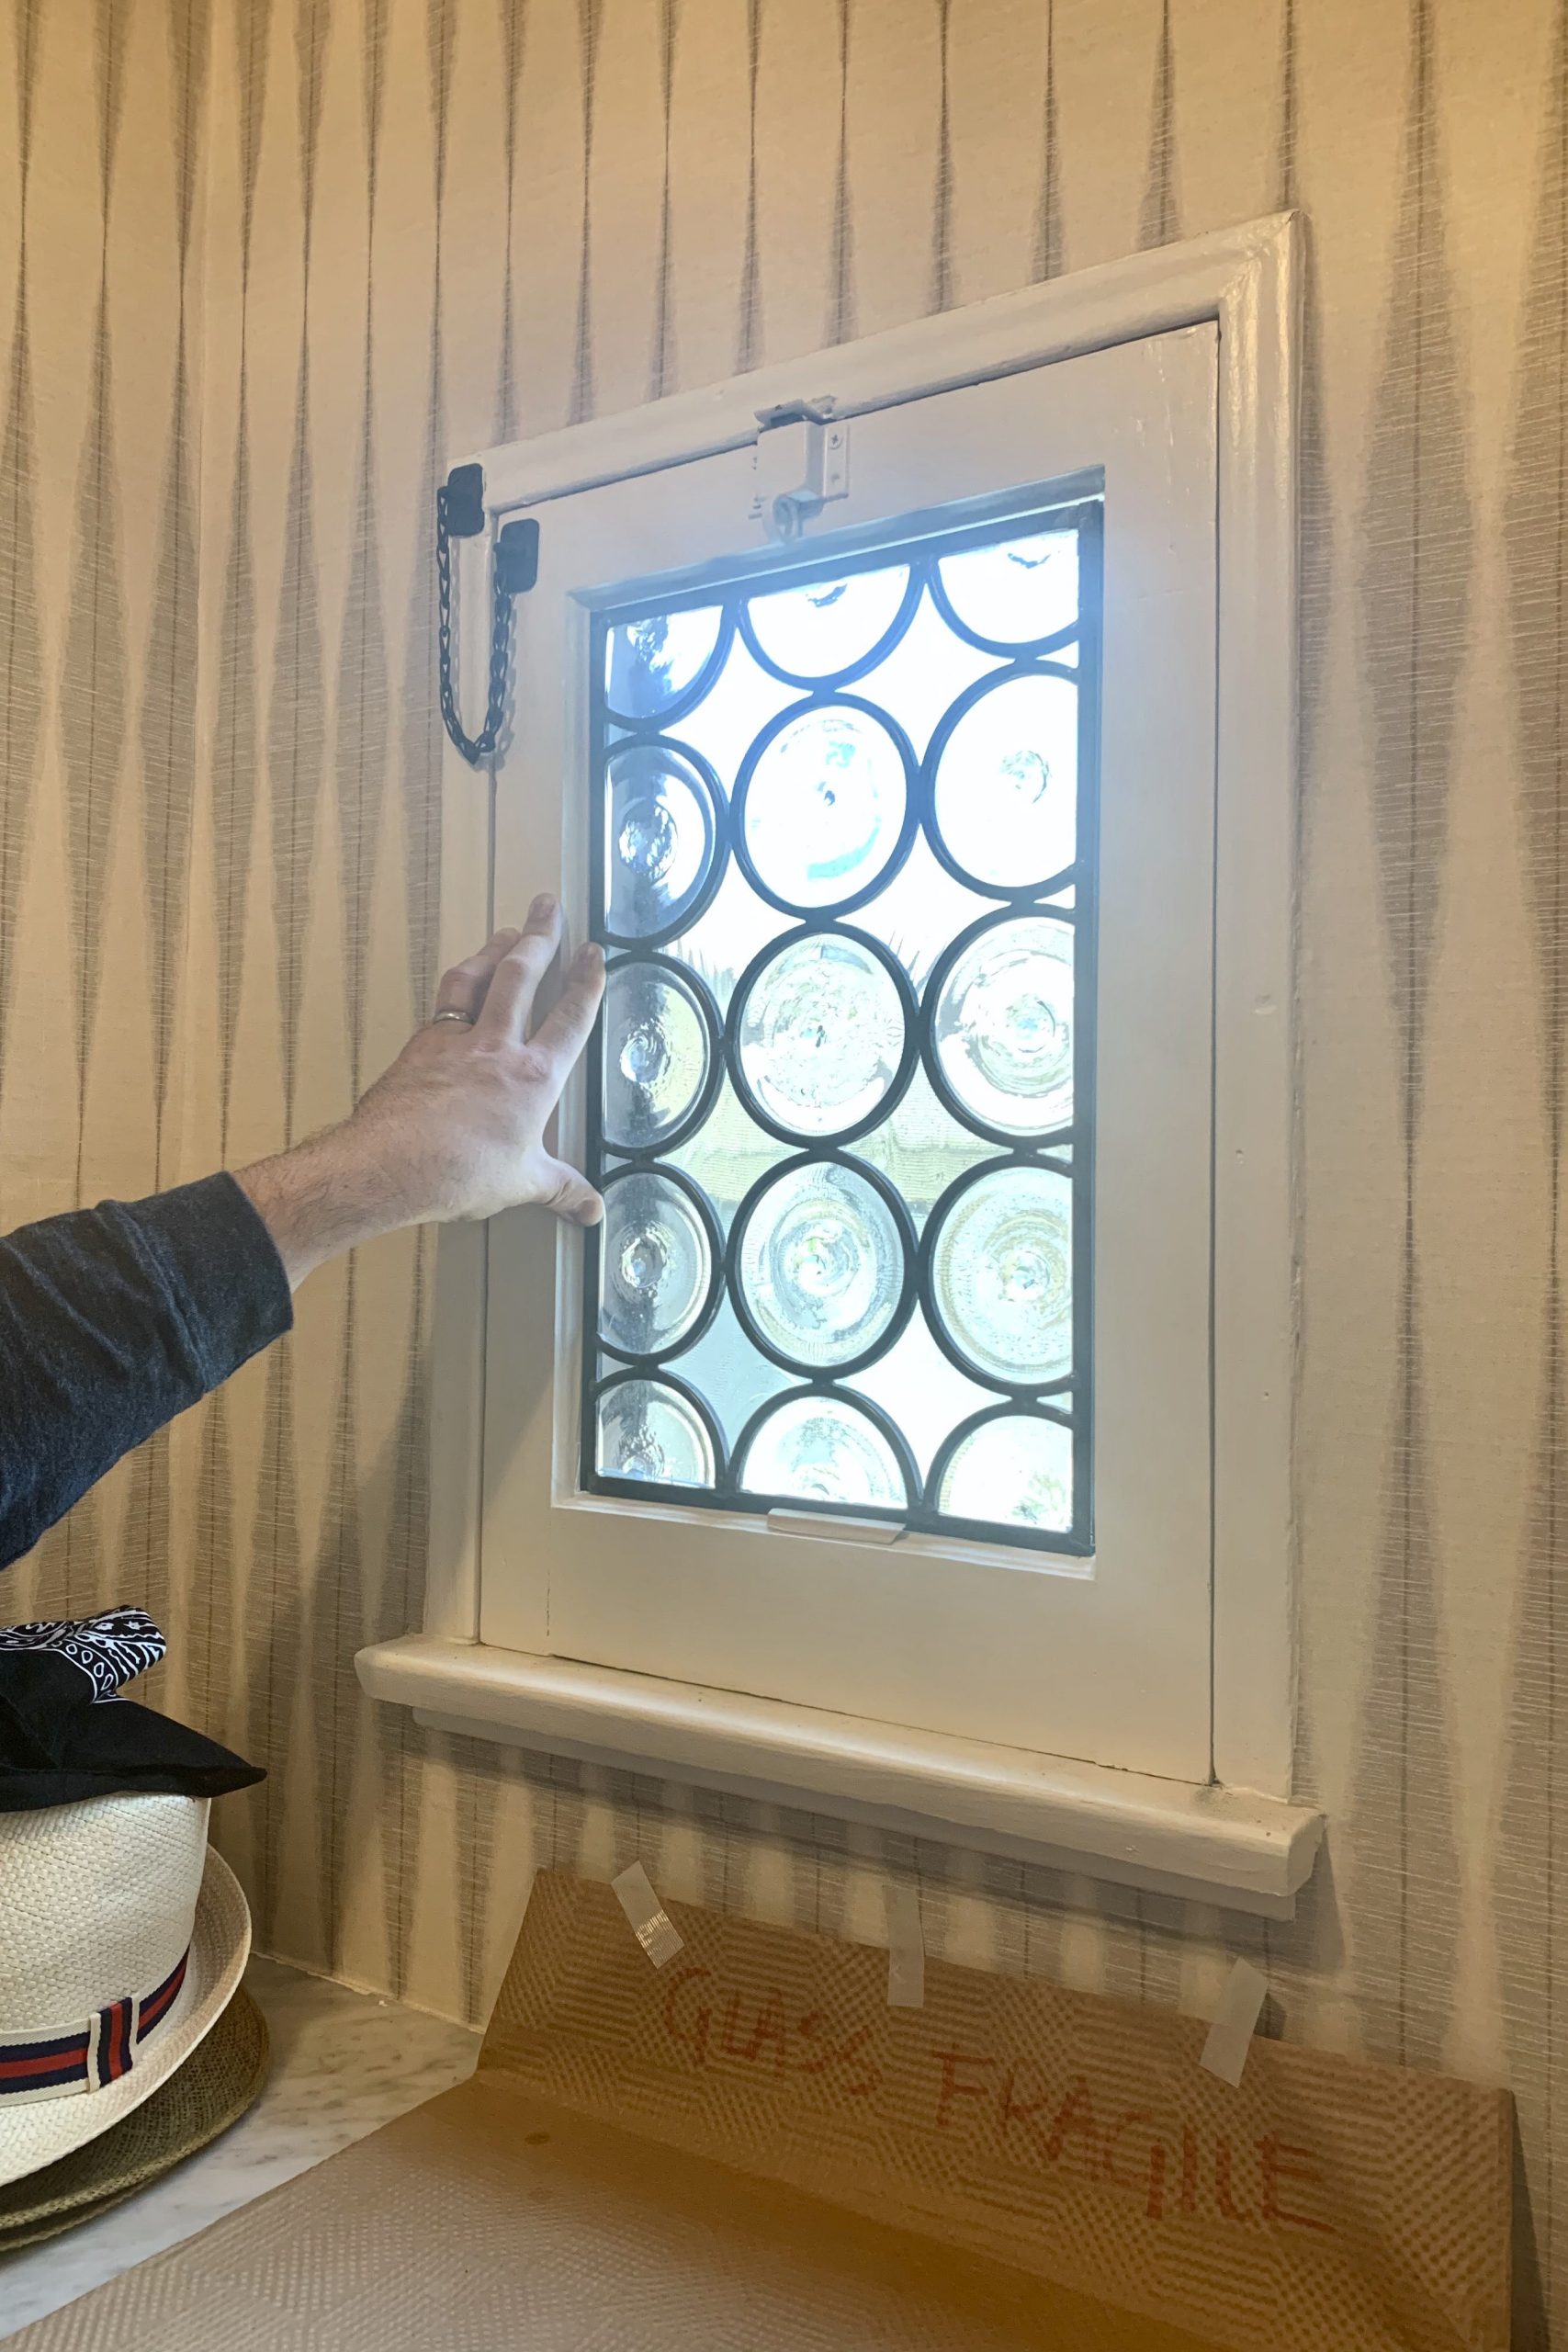
THE CUSTOM WINDOW
Even though Spanish Bungalows (like ours) are a more humble architecture, I was inspired by Spanish Colonial architecture that had more European influences. Custom leaded glass windows are a beautiful way to let in light while still providing privacy and visual interest. I searched for a custom glass maker on Etsy by using Long Beach in the location search options.

I found on Evettro Art In Glass and the owner, Veronica, graciously allowed me to visit her studio to collaborate on the design of the custom window panel I wanted for the closet. I knew I wanted to incorporate bottle glass pieces, which I found out are called rondels. I worked with Evettro to select some hand-blown American glass rondels and some wavy glass panels to fill the negative space in our design. Since I wanted an old world appeal I decided to use a heavy leading between the glass. We did a rough fitting when Veronica finished the panel and I can’t wait to install it permanently, get a load of this!
It’s all coming together so well, and next week I’m going to be showing you more of the details in the closet for the dresser and the new closet organizer. I’ll also be sharing more of the lime wash paint I partnered with Portola Paints on for the bedroom. You won’t want to miss it so be sure to join my newsletter below so you get all the latest updates.
MY WONDERFUL ONE ROOM CHALLENGE SPONSORS AND COLLABORATION PARTNERS:
Faux Wood Beams by Barron Designs
Rug by Jaipur Living
Pillows & Throws by Pom Pom At Home
Limewash Paint by Portola Paints
Roman Shade by Select Blinds
Nightstands by Wisteria
DISCLAIMER: Wrensted Interiors contains some contextual affiliate links. I only recommend products or services I use personally and feel my readers will enjoy. All opinions are 100% mine.